|
Monday, February 23, 2015
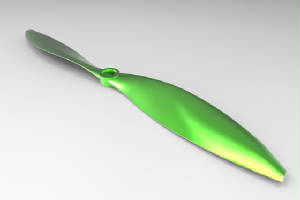
- SolidWorks Propeller for SolidWorks World 2015
I attended SWW2015 in Phoenix AZ as a member of the FabLab
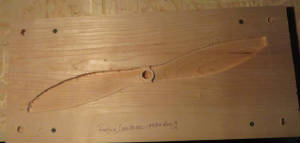
display. Prior to the users group meeting, I downloaded a propeller created in SolidWorks and prepared it for machining on a ShopBot CNC machine.
 Before I started, I reviewed two training videos on the ShopBot website for two sided machining created by TJ Christiansen:
a shorter one that shows the machining and registration in process and a long one that is a detailed review of how to prepare and machine a 3D file such as an .stl using Cut3D and VCarve Pro.
I chose Aspire as my CAD/CAM software since I could bring in the 3D component and create the registration or indexing holes and hold downs
in the same software.
I created 3 different files that were inter-related. In the first file, I set up a
base board that could be screwed onto the table to help me register my machining board. In this file, I set: - The
size of the base board and the machining board: 20 inches tall and 9 inches wide
- The thickness of the material:
.75 inches thick
- The origin of the X and Y axes: In the center of the material
- The origin of the Z axis: At
the table rather than the top of the material
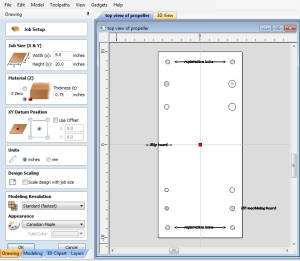
Once the virtual representation of the material appeared, I used the Vector drawing tools on the CAD side of
the Aspire software to draw 4 registration or indexing holes the size of the dowels (plus a .01 allowance). Be sure to
align all the holes so that they are evenly spaced, then center the group of holes in the virtual material. The
align and centering tools are found under the Transform section of the CAD side.
I also drew where to screw down
the base board and the machining boards.
I then saved this file as the Base file, then Saved As: Side 1 to bring
in the 3D component and prepare it for machining.
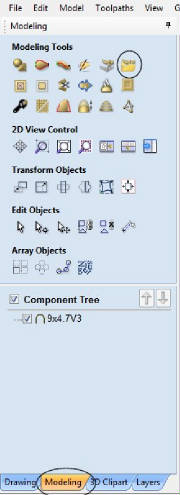
To bring in a 3D model or
component, click on the Modeling tab at the bottom of the CAD screen. The Import 3D component is in the upper right corner
of the menu screen.
 Since SolidWorks parts are drawn in a different orientation than is normal for CNC machining, the part will have
to be rotated. You can also resize the model for the size material you have available. 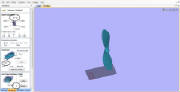 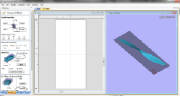 Once the component was imported, I made sure it was centered in the virtual material. (You can open both
the 2D and 3D views at the same time with the correct icon.) I then had Aspire create Vectors around the 3D component. 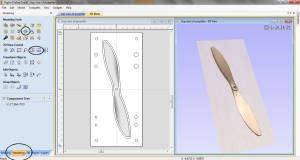 Toolpathing the file is a combination of 2D tool paths (pocketing the registration or indexing holes, drilling
the marks for where to put the hold down screws, profiling on the line for the center lines of the base board) and 3D toolpaths
(roughing the propeller along the grain of the wood with a quarter inch ball-nose bit, finishing the 3D file with the same
bit, but with an 8 or 10 % stepover to get a smooth finish)...and then back to 2D profile outside with tabs to cut out the
propeller. 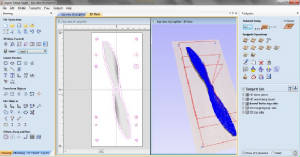 I then saved Side 1, and did a SaveAs for Side 2. On the new Aspire file, I mirrored the registration
holes, and the vector surrounding the propeller to be sure I had the right orientation when I imported the .stl again, this
time from the opposite side. No need to re-toolpath the hold downs, They will be obvious from holding down the first side.
 Review the shorter video for helpful hints on how to set up the files for machining. My files are a little
different, but the idea is the same. Preparing the Base Board-Put down the base
board on the table in the same orientation as the CAD/CAM file -Find the center of the board (drawing diagonals across
the top helps) -Zero the X and Y in where the diagonals cross (Z2 or use the button on the Keypad Screen) -Zero
the Z at the table surface -Mark the Base hold downs and screw the board down -Machine the center lines on
the Base board -Pocket the Registration/Indexing holes in the Base board -If you have not done so, chuck the quarter
inch ball nose bit in the spindle/router -Re-zero the Z at the top of the Base board...this will be the new "table"
after you put down the Machining board P reparing and Machining Side 1-Center the Machining
board on the Base board as best you can -Mark the Machining hold downs and screw the board to the Base -Run the
Registration/Indexing holes on Side 1 of the Machining board -Run the Roughing and Final passes of the 3D files Flipping the Machining board
-Unscrew the Machining board and flip it the correct way! -Insert
dowels into Registration/Indexing holes to position the Machining board. NOTE: be sure the dowels are long enough to
get the board in the correct location, but not so long that the Machining board does not sit flat on the Base board -Screw
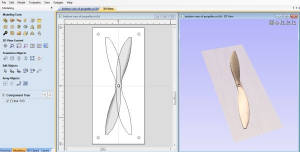
down the Machining board. -Run the Side 2 Roughing and Finishing passes -If necessary, cut out the finished
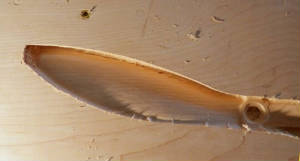
propeller The finished propeller (still in its substrate) aligned perfectly as an example for the SWW2105.
Wednesday, November 16, 2011
Lockridge Artist coming Nov 19 and 20OLLI classes are winding down for the Fall session, and the studio is preparing to make the transition to a gallery for Lockridge
Artists. A bit later than usual, but Sallye has been in DC for DC Week (Digital Capitol) with a Desktop ShopBot.
It was great fun to 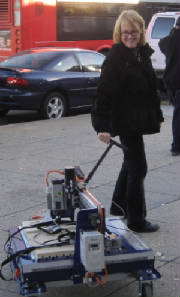 roll the Roving Desktop to various locations and show it off. An evening reception at Room and Board made the
Desktop into a DiningroomTabletop 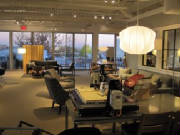 .
Friday, September 9, 2011
Back from Lima, Busy in North CarolinaI'm back in the USA after a great trip to Lima for Fab7. It was great to meet folks from every continent: Europe, Asia, Africa, New Zealand, India, South America and North America.
All interested in digital fabrication, all interested in innovation and communication. Not much glass, but lots of new
friendships and ShopBotters 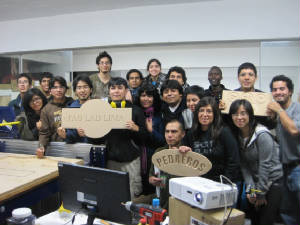 The day after Fab7 was officially over, I met with the students from Lima (and ShopBot Tom from Kenya) for their own
ShopBot training. More pictures and blog on the ShopBot website. The next adventures are back in North Carolina. Glass studio open this Sunday,
Sept 11. The weekend of Sept 16 - 19, I'll be at Sparkcon in Raleigh. Look for the Mobile FabLab and the ShopBot
tent near the sound stage. OLLI classes begin Sept 21 and 22.
Saturday, August 13, 2011
Day 2 LimaFab7 Lima, Day 2 The actual Fab7 doesn’t begin until next week, but the activity surrounding
the FabLab Lima is incredible. Located as we are in the lower level, we don’t see all of it, but
visitors come by on a regular basis…from visiting dignitaries to students from other Universities. If
watching the ShopBot plane the sacrificial board is fascinating, watching your own name cut out is fabuloso, estupendo! In addition
to the Electronics and Digital Fabrication Labs, parts of the School of Architecture itself are getting a facelift. Notably,
the restroom facilities have a new coat of paint and organization. And, they need new signs.
So, several of the regulars got a chance to play with the PartWorks software to design their part files.
After giving them a few hints, I left them to it, and was rewarded with peals of laughter as they worked their way
through the CAD/CAM program. It’s easy for me to think that it’s all about ShopBot, but we are just
a small part of the effort that is going into this. Other works stations (electronics, molding, laser cutting,
even (gasp) another CNC machine, are coming into being. Computers need to be set up, sponsors are setting up their booths,
décor has been fabricated and is being put into place. Victor Freundt, Beno Juarez, and Karin, organizers,
are in constant contact with other universities and officials to promote the idea behind FabLab. Friday night, Sherry Lassiter
and several of the MIT grad students and I were invited to dinner with Jaime Serida Nishimura, Dean, and Santiago Roco, Professor
of Economics, of the Business School at ESAN University in Lima. The main topic was innovation, and how
to foster it. And then, how to manufacture the ideas that may come of the community created by FabLab.
In the meanwhile, there is much to celebrate that is not digital fabrication. Carlos “Pedrero”,
sculptor, borrowed my camera to take videos and pictures of a weaver who is treasured for his techniques. And,
dinner last night was next to an even older treasure, the huaca made of adobe bricks that is thousands of years old.
FabLabbers from around the world are beginning to arrive. I have heard stories from the MIT graduate
students about their adventures setting up labs in Africa and India, and am looking forward to meeting some of the people
from those Labs. Last night, I talked with Jens, from Norway, who is travelling the world to visit the
FabLabs, and see how each Lab uses their equipment. Our conversation included physiological indications of stress level, and
how to create a friendly device that would monitor stress levels and help a person regulate their own heart rate.
And, he also wants to surf while in Lima. His friend from Iceland thinks having a ShopBot to create
surfboards in Iceland would be a great idea.
ShopBot is also posting the blog with
pictures...www.shopbottools.com
10:56 am edt
Friday, August 12, 2011
FAB7...Day 1A fortunately series of events lead me to meet Nadya and Kenny from MIT in the elevator, so I didn't have to brave my way
to the School of Engineering via the crazy bus system (50+ independent bus companies, small bus, one driver threading his
way through traffic, one assistant hanging out the window with a sign indicating their direction, a bus stop any place in
the right two lanes of traffic), or fall prey to the conniving desk clerk who wanted to charge my room 45 soles for a 10 soles
taxi ride. Lima is amazing...street stalls hanging with (I hope) freshly killed chickens, fruit, and the soles of shoes
waiting to be fabricated to fit your feet. A whole part of town devoted to the sale of toilet paper. Last night,
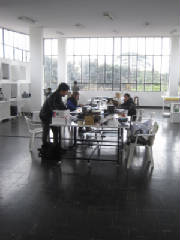
we had dinner next to a pre-Incan ruin in the center of town. The FAB7 is taking place at the School of Architecture,
a brick and glass enclave, complete with Peruvian totems, nestled against a hill side of dirt and shanties. Victor,
Beno, Karen and many many others have created a light-filled electronics lab and a white and clean feeling digital fabrication
lab out of two storage rooms that had been filled with 50 years of furniture, debris and dust. In three weeks!!! The
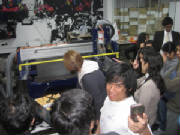
ShopBot was up and wired, so we spent the day grounding and putting on the support board. People are SOOO EXCITED about
it that, as soon as I started moving it around, 2-3 people came in to watch. Then, they went and got 10 more people,
so I switched to showing them the software. Then, they went and got 10-15 more people. So, the maiden test was
in front of 30 people. Needless to say, we had issues, but they did get to see it move a bit before we sent them away
while we worked on it. By the end of the day, we were able to surface the table, and use the Bot to countersink the
holes for the support board. Manuel and Gina were so excited that they were dancing every time they started a part file.
Even Julio, who can't speak a word of English, willingly vacuumed and swept when needed, then quietly grinned the biggest
grin you have ever seen when he was asked to run the ShopBot.
|